For a little game, I needed to drag and drop items. I have never seen it as easy as in Flutter. So in this blog post, we will describe how to implement the drag and drop of checkers on checkerboard in Flutter. The goal is to draw a checkerboard, add checkers, and make it possible for the checkers to be dragged around. For state management, we will use the provider. If this is completely new to you, the previous blog post explaining the Provider might be useful as won’t cover it completely in this post.
Setup the project
Before we can start with coding, we are going to add a dependency to the project, namely provider. Their package page contains a lot of useful information and references to more use cases and examples
dependencies:
  provider: ^4.3.2+3
Do not forget to install the dependency, running the following command:
flutter pub getThat is it! We can now start with rewriting the example.
Drawing a checkerboard
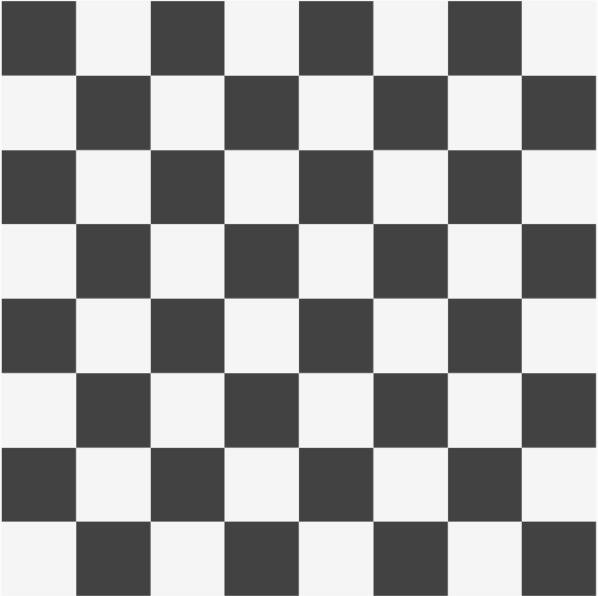
Since we are going to show how drag and drop work on a checkboard, so let’s start by drawing a checkerboard. We have already shown how to draw a hexagonal grid, but luckily, the checkerboard is much simpler. Flutter provides a GridView, which we can utilize to draw the checkerboard.
class CheckerBoard extends StatefulWidget {
  @override
  _CheckerBoardState createState() => _CheckerBoardState();
}

class _CheckerBoardState extends State<CheckerBoard> {
  final List<Square> squares = [];

  @override
  void initState() {
    super.initState();
    for (var x = 0; x < 8; x++) {
      for (var y = 0; y < 8; y++) {
        squares.add(new Square(x: x, y: y));
      }
    }
  }

  @override
  Widget build(BuildContext context) {
    return GridView.count(
        physics: new NeverScrollableScrollPhysics(),
        padding: const EdgeInsets.all(10),
        crossAxisCount: 8,
        children: squares);
  }
}

class Square extends StatelessWidget {
  final int x;
  final int y;

  Color getColor() {
    if (x % 2 == y % 2) {
      return Colors.grey[800];
    }
    return Colors.grey[100];
  }

  const Square({Key key, this.x, this.y}) : super(key: key);
  @override
  Widget build(BuildContext context) {
    return Container(
      color: getColor(),
    );
  }
}
The square returns the correct color, based on the position on the board. In the _CheckerBoardState we initialise the squares and provide them to the GridView. The GridView will put all the squares in a Grid and now we have a checkerboard!
Adding Draggable Checkers
We can now add some checkers that we can drag around the board. The Checker Widget should return a Draggable Widget. For the Draggable Widget, we will have to return two things, the feedback, and the child. The child is what you see before you start dragging around. The feedback is what we are dragging around.
class Checker extends StatelessWidget {
  @override
  Widget build(BuildContext context) {
    return Draggable(
      feedback: Container(
        child: Icon(
          Icons.circle,
          color: Colors.red,
          size: 35,
        ),
      ),
      child: Container(
        child: Icon(
          Icons.circle,
          color: Colors.blue,
          size: 35,
        ),
      ),
    );
  }
}
For now we will simply add the Widget to the screen by appending the Checker to the list that is displayed by the GridView. For this we change the list of Squares in a list of Widgets and append the Checker to the list.
  final List<Widget> widgets = [];
  @override
  void initState() {
    super.initState();
    for (var x = 0; x < 8; x++) {
      for (var y = 0; y < 8; y++) {
        widgets.add(new Square(x: x, y: y));
      }
    }
    widgets.add(Checker());
  }
We can now move around the checker, but we cannot place it anywhere yet. If you want to play around with the code so far, you can do so on this Dartpad.
Dropping the Checkers on the Squares
For the checkers to be droppable on the squares, we need another part of the Flutter Library, namely the DragTarget. As the name explains, Draggables can be dragged on the DragTargets. Before we start with changing the Squares in DragTargets, we are going to change some of the state management, to keep the application simple. As you could see at the setup, we added the provider dependency. We will be using the Provider to do state management. If this is completely new to you, the previous blog post explaining the Provider might be useful as we won’t go in-depth here.
The Board class will maintain the state of the board. Here we are interested in multiple things.
- Squares
- Checkers
- Position on the Checkers
We support three operations that change the state:
- Start of picking up a checker
- Dropping the checker on a square
- Canceling dragging the checker (i.e. dropping it outside of the checkerboard)
class Board extends ChangeNotifier {
  List<PositionsOnBoard> _state = [];
  List<Square> _grid = [];
  List<Checker> _checkers = [];

  Board() {
    int id = 0;
    for (var x = 0; x < 8; x++) {
      for (var y = 0; y < 8; y++) {
        var tile = new Square(x: x, y: y, id: id);
        _grid.add(tile);
        id++;
      }
    }
    _checkers.add(Checker(id: 1));
    _state.add(PositionsOnBoard(1, 12));
  }

  List<Square> grid() => _grid.toList();

  Checker getCurrent(int gridId) {
    var position = _state.firstWhere((element) => element.squareId == gridId,
        orElse: () => null);
    if (position == null || position.dragged) {
      return null;
    }
    return _checkers.firstWhere((element) => element.id == position.checkerId);
  }

  startMove(int id) {
    _state.firstWhere((element) => element.checkerId == id).dragged = true;
    notifyListeners();
  }

  cancelMove(int id) {
    _state.firstWhere((element) => element.checkerId == id).dragged = false;
    notifyListeners();
  }

  finishMove(int id, int to) {
    _state.firstWhere((element) => element.checkerId == id).dragged = false;
    _state.firstWhere((element) => element.checkerId == id).squareId = to;
    notifyListeners();
  }
}

class PositionsOnBoard {
  int checkerId;
  int squareId;
  bool dragged = false;

  PositionsOnBoard(int checkerId, int gridId) {
    this.checkerId = checkerId;
    this.squareId = gridId;
  }
}
So we can now extend our Draggable Checker. We provide it with an id, so that the state can keep track of it. The Draggable has an option for data. This is what the DragTarget will receive when we try to drop it. We will also call the board and update it when the checker is starting to move and when the move is cancelled.
class Checker extends StatelessWidget {
  final int id;

  const Checker({Key key, this.id}) : super(key: key);

  @override
  Widget build(BuildContext context) {
    return Consumer<Board>(builder: (context, state, child) {
      return Draggable(
        data: id,
        onDragStarted: () {
          state.startMove(id);
        },
        onDraggableCanceled: (a, b) {
          state.cancelMove(id);
        },
        feedback: Container(
          child: Icon(
            Icons.circle,
            color: Colors.brown[300],
            size: 35,
          ),
        ),
        child: Container(
          child: Icon(
            Icons.circle,
            color: Colors.brown[300],
            size: 35,
          ),
        ),
      );
    });
  }
}
We can now extend the Square and wrap it with a DragTarget. This makes it possible for Draggables to be dropped on the target. For the drawing of the square, we will ask the state if there is a checker on the current position. If it is, then we will draw the checker there. Two functions we need to implement to complete the example are the onWillAccept and the onAccept. The onWillAccept should return a boolean whether or not the checker we can drop the checker there. In our case, we can drop the current checker back on the square, or we can drop a checker on an empty square. Finally, the onAccept function, here we handle the dropping of the checker. We are asking the state to finish the movement of the checker.
class Square extends StatelessWidget {
  final int x;
  final int y;
  final int id;

  const Square({Key key, this.x, this.y, this.id}) : super(key: key);

  Color getColor() {
    if (x % 2 == y % 2) {
      return Colors.grey[800];
    }
    return Colors.grey[100];
  }

  @override
  Widget build(BuildContext context) {
    return Consumer<Board>(builder: (context, state, child) {
      var current = state.getCurrent(id);
      return DragTarget(
        builder: (BuildContext context, List<dynamic> candidateData,
            List<dynamic> rejectedData) {
          return Container(
            child: current,
            color: getColor(),
          );
        },
        onWillAccept: (data) {
          return current == null || data == current.id;
        },
        onAccept: (int data) {
          state.finishMove(data, id);
        },
      );
    });
  }
}
The last change we have to make is to simply the parent Widget. We have to provide the Board to the underlying Widgets and we have to provide the Widgets as children to the GridView.
        body: ChangeNotifierProvider(
          create: (context) => Board(),
          child: Consumer<Board>(builder: (context, state, child) {
            return GridView.count(
              physics: new NeverScrollableScrollPhysics(),
              padding: const EdgeInsets.all(10),
              crossAxisCount: 8,
              children: state.grid(),
            );
          }),
        ),
That is it! We found it really simple compared to other languages and frameworks. If you are want to see all the code, you can find it on Github. In this blog post, we will look at how to change the state management to Riverpod and make it more scalable. When you still have any questions or suggestions, feel free to leave a comment! Thanks for reading.
Hey Bart, what an awesome tutorial! I am using your code for a base of a game(https://github.com/Barttje/drag-and-drop-example/blob/master/lib/main.dart).
I am a first timer in Dart, I have 3 doubts(if you had time)I would like to ask:
1)If I want to swap the cheekers(My cheekers aren’t equal) from one position to another(like the piece in the “0” position goes to “1”, and “1” goes to “0”), how do I do that?
2)If I want to count every movement(when a cheeker is dropped in the table) I should put a counter in onAccept(within the Draggable)?
3)A complex one(I understand if you can’t answer):
My game will allow the value of a cheeker to be added with another(in the same line), How could I sum an Element of the square with another using your approach?
NOTE: My cheekers are CustomPaint ones with a value(int) showing in the face of each one.
NOTE2:My other Gmail account went nuts(I can’t log in), and I wrote again because I don’t know if it was posted or not. Sorry for the inconvenience.
all the best,
DDias.
Hello DDias,
Thank you for reaching out. I understand your questions regarding state management. The goal was to explain how drag and drop works. However, I am currently working on a game with checkers that has more use cases. I will write about this approach in a blog post and answer your questions there or get back to you personally if I won’t.
Greetings,
Bart