In the last post, we showed how to create Tic Tac Toe in Flutter. We used the CustomPainter to draw the different elements in Tic Tac Toe. The main reason for that was to make it easier to add animations. This is exactly what we are going to do now. First, we are going to draw the crosses and animate the lines one by one. After that we are going to add the animation for the circle and finally we are going to animate the winning line.
Animating the crosses
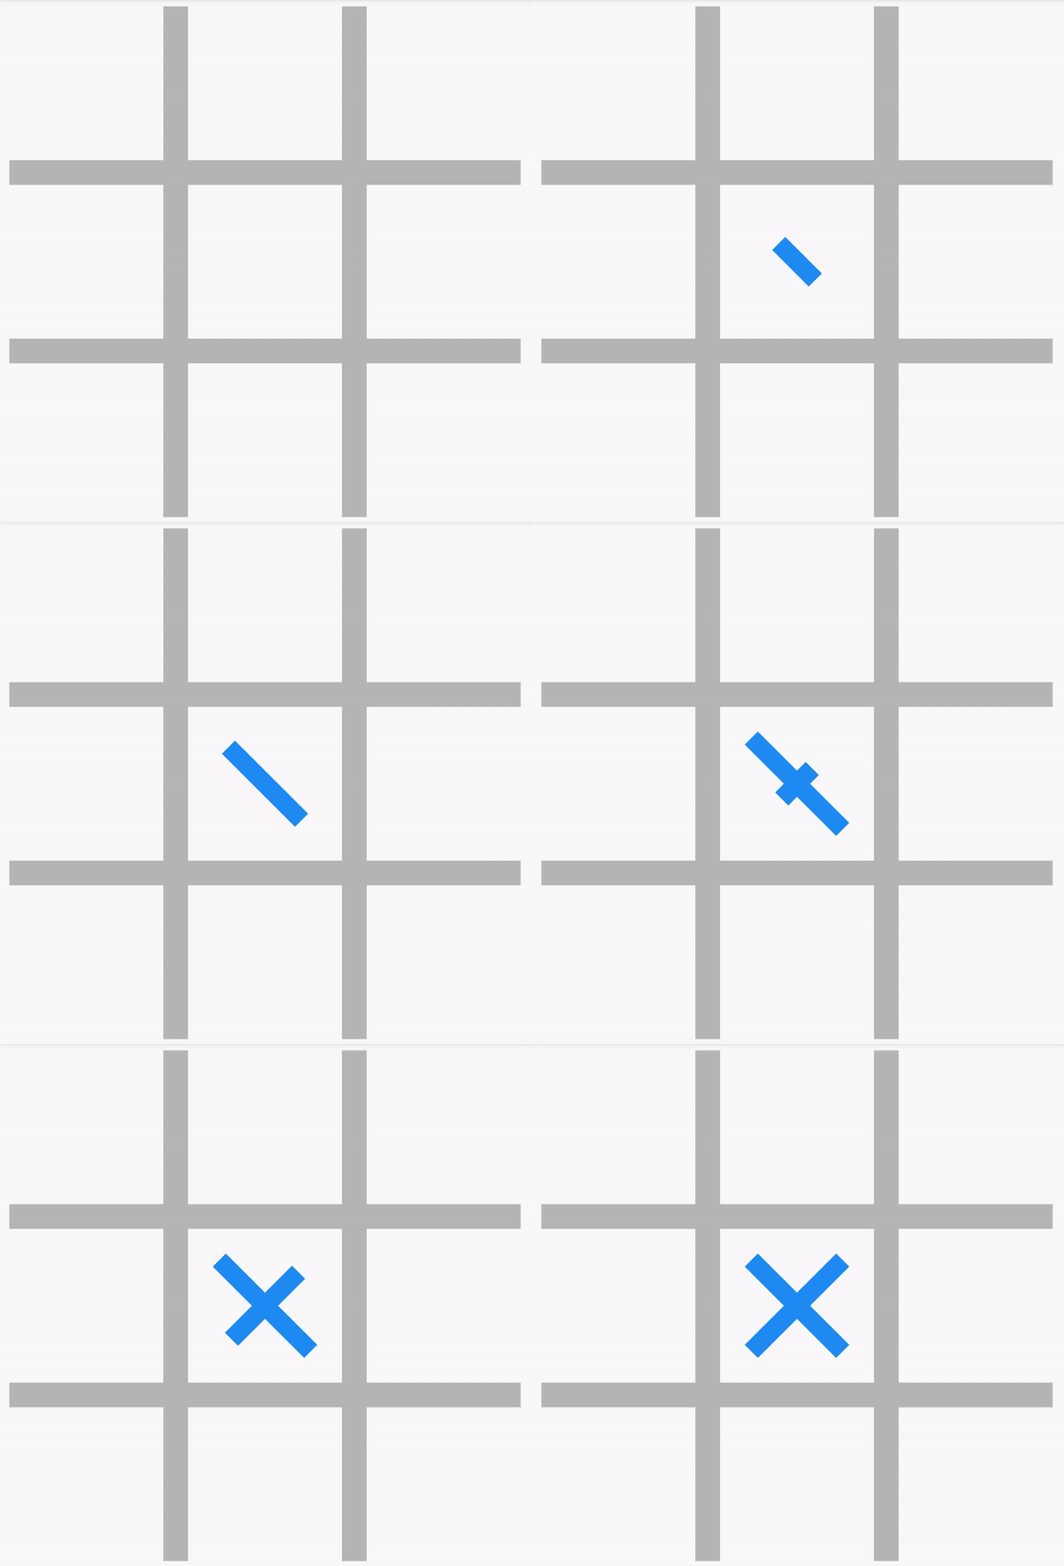
We are going to start with the crosses. The first thing we have to do, is to adjust the CrossPainter. We are going to pass a percentage variable to the constructor. Based on the percentage we are going to draw the first and the second line. We ware only going to draw the second line when the percentage is above fifty. Thus: max(0, (percentage – 50) * 2), we want to draw the complete line when we are at fifty, but we never want to draw more than hundred procent of one line thus for the first line the percentage is: min(100, percentage * 2). We compute the start and endpoint of the line by multiplying by radius * (percentage / 100).
class CrossPainter extends CustomPainter {
  final double percentage;
  double radius = 0;
  CrossPainter(this.percentage);

  @override
  void paint(Canvas canvas, Size size) {
    radius = min(size.height, size.width) / 2 - 10;
    Offset center = Offset(size.width / 2, size.height / 2);

    var crossAngle = (math.pi * 2) / 8;
    var crossAngle2 = crossAngle * 3;
    createPath(canvas, center, crossAngle, min(100, percentage * 2));
    createPath(canvas, center, crossAngle2, max(0, (percentage - 50) * 2));
  }

  void createPath(final Canvas canvas, final Offset center,
      final double startingAngle, final double percentage) {
    Paint paint = Paint()
      ..color = Colors.blue
      ..strokeWidth = 15;
    var angle = math.pi;

    Offset firstPoint = Offset(
        radius * (percentage / 100) * math.cos(startingAngle),
        radius * (percentage / 100) * math.sin(startingAngle));
    Offset secondPoint = Offset(
        radius * (percentage / 100) * math.cos(startingAngle + angle),
        radius * (percentage / 100) * math.sin(startingAngle + angle));
    Offset firstActualPoint =
        Offset(firstPoint.dx + center.dx, firstPoint.dy + center.dy);
    Offset secondActualPoint =
        Offset(secondPoint.dx + center.dx, secondPoint.dy + center.dy);
    canvas.drawLine(firstActualPoint, secondActualPoint, paint);
  }
  @override
  bool shouldRepaint(CrossPainter oldDelegate) {
    return oldDelegate.percentage != percentage;
  }
}
We should not forgot to adjust the shouldRepaint method. This used to return false, since our crosses never changed. However, the crosses should be redrawn when the percentage has changed. So how do we supply the percentage to the CrossPainter. We already had the SquareState and the update method. In the update method we are going to start the Animation controller. This Animation Controller and Animation are initialised in the initState method. Here we can supply the duration of the animation when creating a new controller. For the animation use a TweenAnimation. This animation iterates between two values, for us it should go from zero to hundred.
After we started the controller we can access the current value with painter: CrossPainter(animation.value). The final change have to make before this will work is to change the extends of the SquareState. This should be extended with the SingleTickerProviderStateMixin. Otherwise it will not be possible to create an animation controller.
class SquareState extends State<Square> with SingleTickerProviderStateMixin {
  Animation<double> animation;
  AnimationController controller;
  double top;
  double left;

  @override
  void initState() {
    super.initState();
    controller = AnimationController(
        duration: const Duration(milliseconds: 800), vsync: this);
    animation = Tween<double>(begin: 0, end: 100).animate(controller)
      ..addListener(() {
        setState(() {});
      });
    left = widget.model.x * (axisWidth + widget.model.width);
    top = widget.model.y * (axisWidth + widget.model.width);
  }

  void update(Player player) {
    setState(() {
    widget.model.player = player;
    controller.forward();
    });
  }

  @override
  Widget build(BuildContext context) {
    return Positioned(
      top: top,
      left: left,
      child: getChild(),
    );
  }
  Widget cross() => CustomPaint(
        painter: CrossPainter(animation.value),
        child: Container(
          width: widget.model.width,
          height: widget.model.width,
        ),
      );
// other methods
}
Let’s try it out, if we click on one of the squares the following animation should be started:

Animating the circles
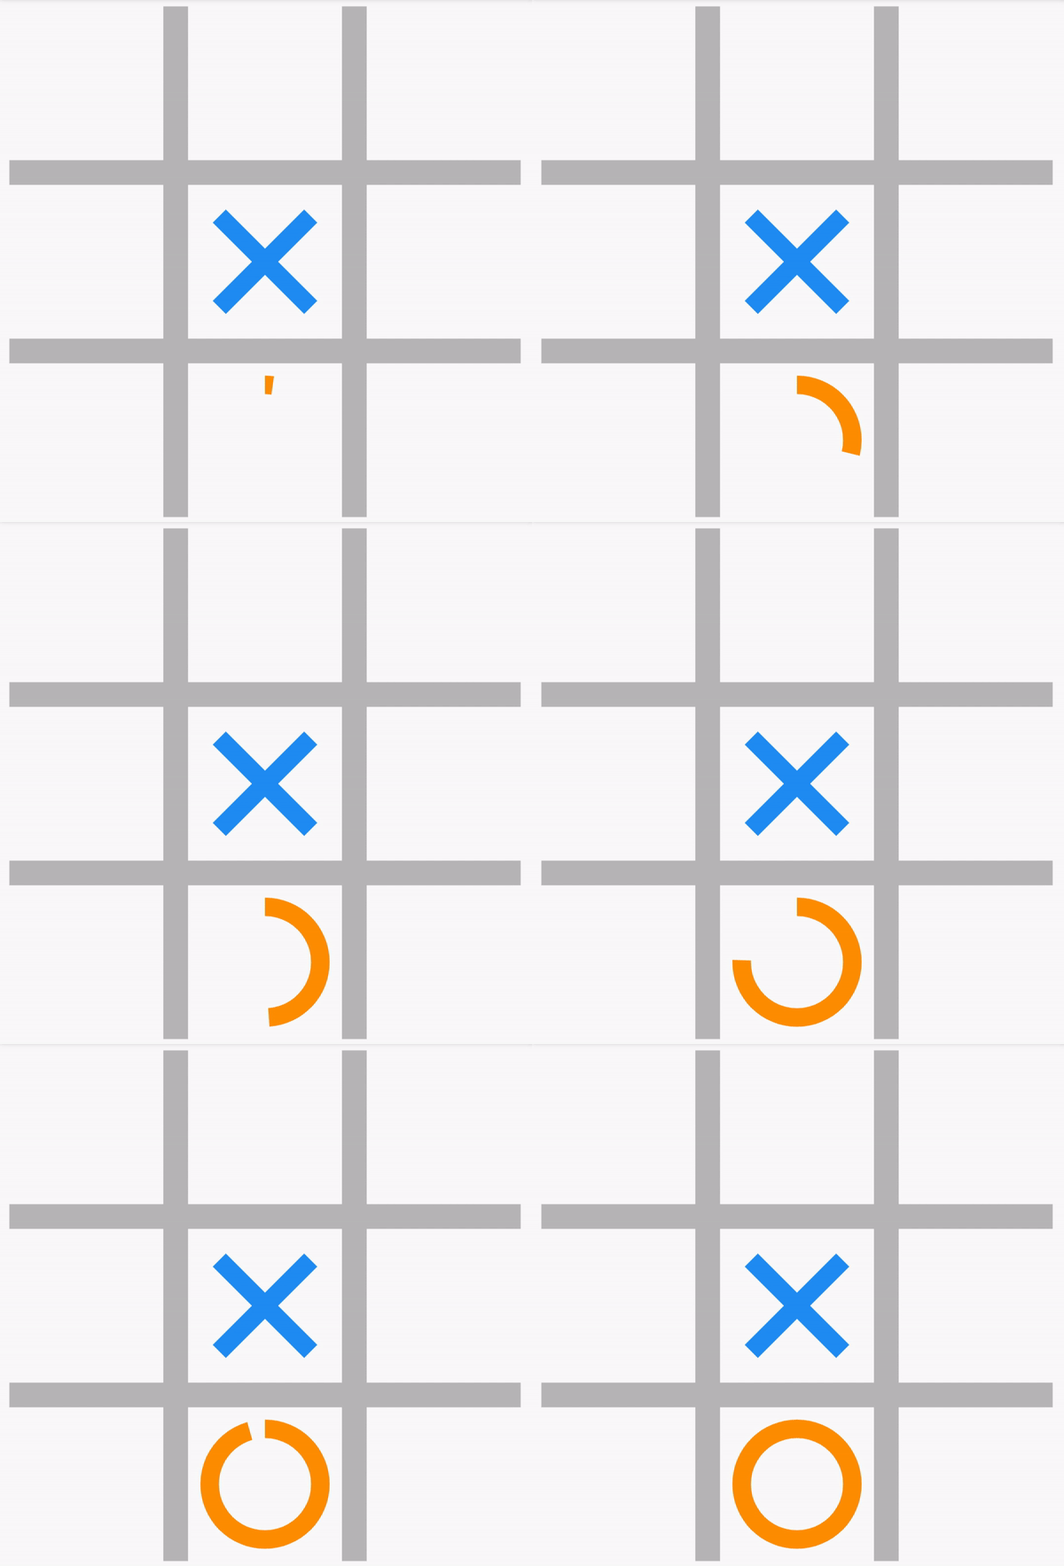
After we animated the crosses, the next step is easy. We are going to animate the circle. As we have already adjusted the SquareState, we only have to change the CirclePainter. For the CirclePainter, we can use the drawArc method provided by the Canvas. This method expect multiple parameters:
void drawArc(Rect rect, double startAngle, double sweepAngle, bool useCenter, Paint paint) The first is the rect which we are going to use as the basis for the circle. The startAngle is where the arc should start and the sweepAngle is the part of circle that will be filled. The useCenter can be used to include a line through the center ( which we do not want ). Finally the paint, which can remain the same as in the previous CirclePainter.
For the CirclePainter we also added the percentage to the constructor. This can be used to compute the sweepAngle. Since two pi is a full circle, the sweepAngle should be: 2 * pi * (percentage / 100).
class CirclePainter extends CustomPainter {
  double outerBorder = 15;
  double percentage = 0;

  CirclePainter(double percentage) {
    this.percentage = percentage;
  }

  @override
  bool shouldRepaint(CirclePainter oldDelegate) {
    return oldDelegate.percentage != percentage;
  }

  @override
  void paint(Canvas canvas, Size size) {
    double radius = min(size.height, size.width) / 2 - 10;
    Offset center = Offset(size.width / 2, size.height / 2);
    Rect outerRect =
        Rect.fromCircle(center: center, radius: radius - (outerBorder) / 2);
    canvas.drawArc(
        outerRect,
        1.5 * pi,
        2 * pi * (percentage / 100),
        false,
        Paint()
          ..color = Colors.orange
          ..strokeWidth = outerBorder
          ..style = PaintingStyle.stroke);
  }
}
If we are going to click now, we should see the following animation:

Animating the winning line
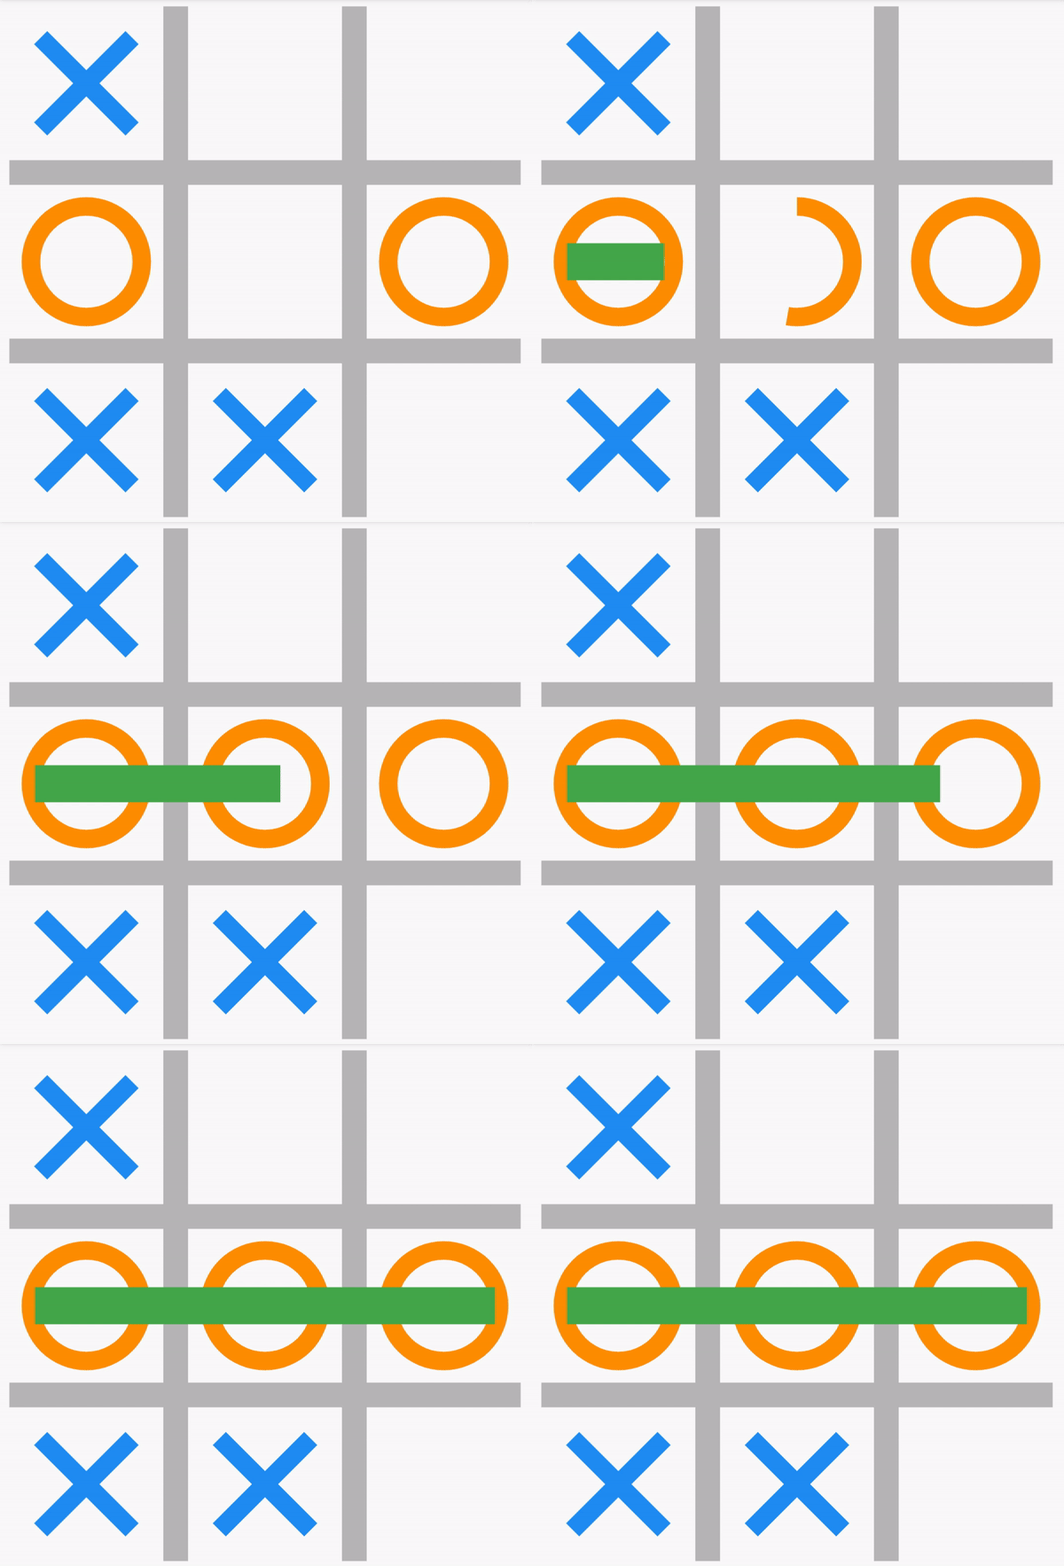
For the winning line, we are going to adjust the LinePainter in the same way as the CrossPainter. Since this step is almost the same as with the CrossPainter, we are going to omit this step. ( All code can be found here if you still want to see this step). So what do we need to do instead of adding a LinePainter? We are going to create a new Widget. The WinningLine is a StatefulWidget. Instead of adding a controller and animation, we are going to use an AnimationBuilder. Here we can supply a Tween from zero to hundred, duration, and then use the value percentage in the builder.
class WinningLineModel {
  final Offset start;
  final Offset end;

  WinningLineModel(this.start, this.end);
}

class WinningLine extends StatefulWidget {
  final WinningLineModel model;
  const WinningLine({Key key, this.model}) : super(key: key);
  @override
  _WinningLineState createState() => _WinningLineState();
}

class _WinningLineState extends State<WinningLine>
    with SingleTickerProviderStateMixin {
  @override
  Widget build(BuildContext context) {
    return TweenAnimationBuilder(
        tween: Tween<double>(begin: 0, end: 100),
        duration: Duration(seconds: 1),
        builder: (BuildContext context, double percentage, Widget child) {
          return CustomPaint(
            painter: LinePainter(percentage, widget.model.start,
                widget.model.end, 30, Colors.green),
            child: Container(),
          );
        });
  }
}
We can now add this Widget and the animation will start:
  void checkIfPlayerWon(Player player) {
    Result result = playerWon(squares, player, length);
    if (result.won) {
      setState(() {
        widgets.add(
          WinningLine(model: WinningLineModel(result.begin, result.end)),
        );
      });
    }
  }
Thanks for reading the blog! The full code can be found here in Github. I have also added all classes together in this Dartpad, so it can be run without installing anything. If you have any questions, suggestions, or requests for new blogs. Feel free to let me know!