In this weekly blog series about Cat and Mice, I will discuss the whole process, from design to implementation, from publishing to artificial intelligence. Cat and Mice is a game that is played on a checkers board. One player plays the cat and has only one piece. The piece of this player starts at one side of the checker’s board. On the other side are four pieces of the mice. The goal for the cat is to reach the other side of the checker’s board. The goal for the mice is to prevent this. This first article will discuss setting up the CI/CD and creating a beta release in the Google Play Store.
About this blog series
This blog series will follow me along in the making of a simple game with Flutter. Not just the technical parts but also everything that happens around the implementation. Here are the links to the previous blog posts:
Setting up CI/CD
Before I start with the implementation, I will first set up the CI/CD. There are three services mentioned in the Flutter documentation that provide an all-in-one solution.
I have decided to try Codemagic for this project, but I am pretty sure the other two options are just as easy to set up. It is also possible to integrate the delivery with your current workflows. For example, in the Flutter documentation, they explain how to integrate Fastlane to make this work.
Before I get started with Codemagic, there are few things to be done. First, I have to sign the App for with my key in a Keystore. This way, I can sign the release to let Google know that the same developers created the App. Next, I followed the steps here to generate a new Keystore and adjust the build.gradle. Finally, I made sure that I could build a new release and uploaded it as a new app on the Play Console.
Configuring the signing is simple in Codemagic. In the signing step, you can upload the key store and the passwords. Setting up the automatic deployment was a little bit more difficult, but nothing to be afraid of. You can follow the steps here to configure the publishing part of the pipeline. Finally, you can upload the downloaded credentials in Codemagic, and all should be ready.
Mistakes during configuration
Unfortunately, not everything went according to plan. Luckily those were minor mistakes, but they still take some time to figure out. I will include the details to show nobody is perfect and hopefully prevent you from making the same mistakes.

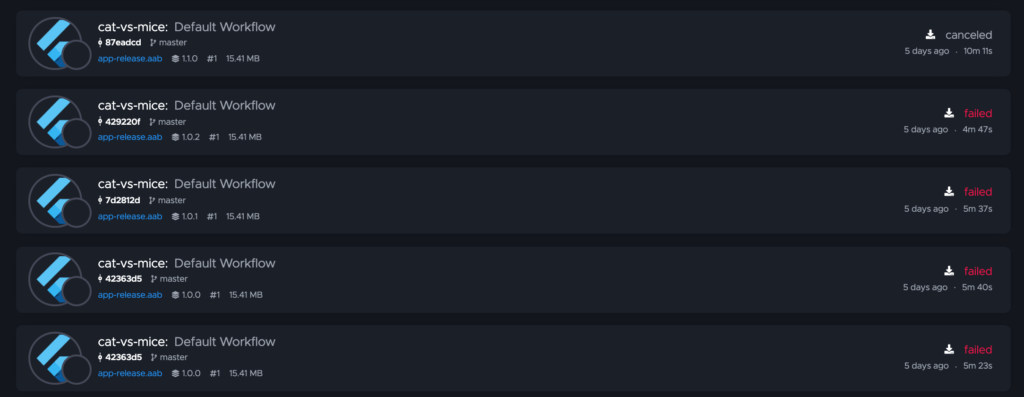
The first mistake was foolish. The error message says the key was not the same as the key in the first version I uploaded to the Play Console. Unfortunately, this meant the play Store could not detect my signing. So I uploaded my key store again. Then, I double-checked the keys in the error message with the key in the key store. When making a new build locally, I finally realized that I did not commit my changes to Github.
Publishing failed :| Google Play failed to upload artefacts. The Android App Bundle was signed with the wrong key. Found: xx, expected: yy: { "error": { "code": 403, "message": "The Android App Bundle was signed with the wrong key. Found: SHA1: xx, expected: yy", "status": "PERMISSION_DENIED" } }The second error was a pretty obvious one. The version is already used. This should be an easy fix by committing a new version. However, I struggled with the version. I forgot about how the version properties are used and tried to update the version wrongly. The version before the + is used as the version name, and the version behind the + is used as version code. I updated the version name but not the code. Perhaps I should have included the build versioning by Codemagic.
Publishing failed :| Google Play failed to upload artefacts. APK specifies a version code that has already been used.: { "error": { "code": 403, "message": "APK specifies a version code that has already been used.", "status": "PERMISSION_DENIED" } }
Draft version, cannot upload new version now, will show result later 🙂
Publishing failed :| Google Play failed to upload artefacts. Only releases with status draft may be created on draft app.: { "error": { "code": 400, "message": "Only releases with status draft may be created on draft app.", "status": "INVALID_ARGUMENT" } }Create a logo
I made a start with the design and created a few simple logos with Squarespace. Then, I used Squarespace to look at some of the icons available that match the App’s theme. I have found three icons that are a pretty good match. The logos look pretty good for now, but they will probably need an upgrade later.


Inspire ideas
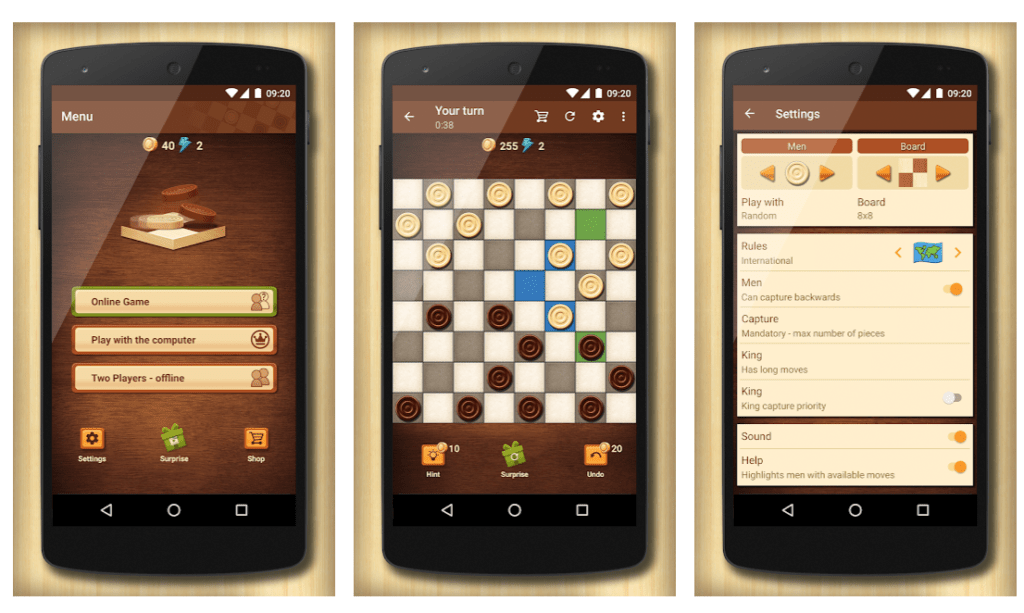
I have also spent some time looking at other checkers’ games. When looking, I was a bit amazed by how many checkers games there are. Luckily my game is a variation I have not found yet, but I also think it will be hard for people to find it. Anyway, that is is a problem for later. So first, let’s take a look at some exciting checkers’ games. The first is this game here! I like the main menu, as the options for games are clear. The settings and the shop are less visible and will probably be used less. I also like the settings menu, but I probably do not need as many settings as the rules are clear for my game.

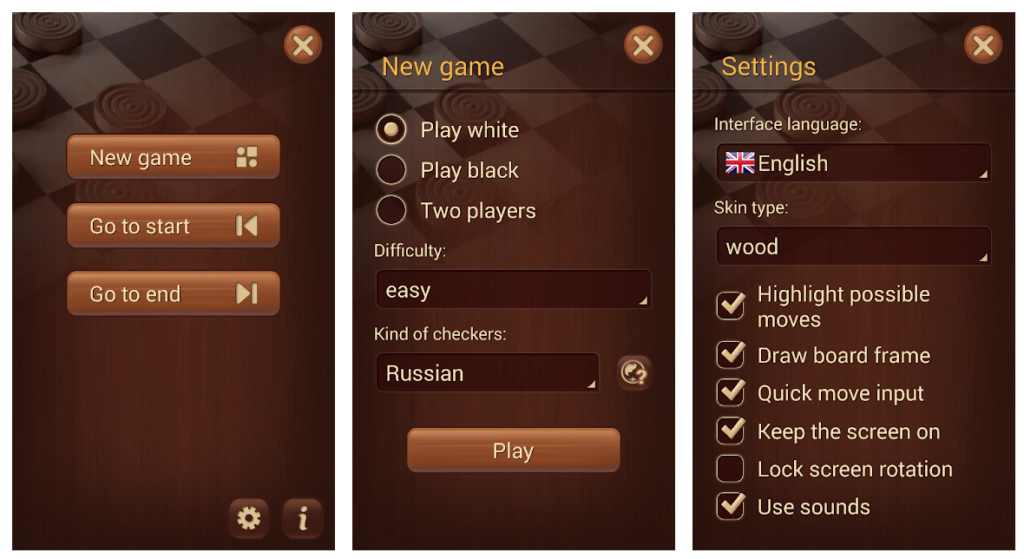
The second one that I liked was All-In-One Checker. Here the option for a one or two-player game is in the new game menu. It is also possible to set the difficulty of the AI here. Some of the settings here might be useful to implement later, such as highlighting possible moves and keeping the screen on.

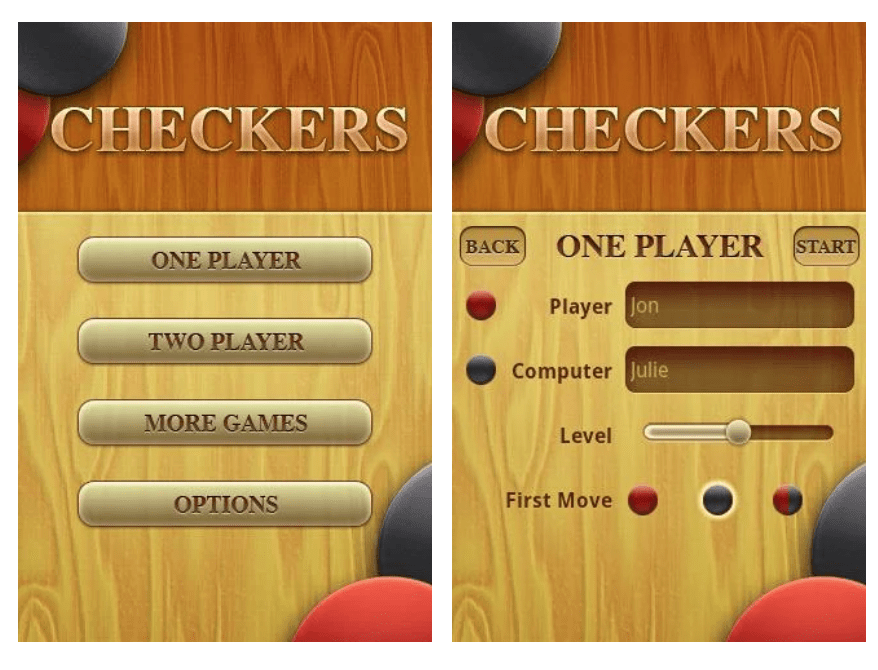
This is a screenshot from the last game that I liked. I liked that you can give the player names, which might be useful to know which turn it is. The slider for the difficulty might be useful to depend on how the AI is going to work. Furthermore, it has more games options. This might be useful to improve the popularity of other games.

After looking at the other checker’s games, I have realized two things. First, there are many ways to design the menu and the game. Second, there are a lot of checker’s games in the Play Store. In the next post, I will discuss the architecture of the application. If you want to follow along, I will publish my updates on Twitter. In addition, you can see my progress on the code on Github.
Looking forward to the rest of the series. I added this to my newsletter https://ishouldgotosleep.com/this-week-in-flutter-10/